mozzo's Safety Data Sheet (SDS) feature makes managing your SDS library and printing secondary chemical container labels a snap.
1. To provide access to this feature inside your organization, first navigate to the Safety Data Sheets feature, found under Safety on the top level navigation.
The mozzo Primary Seat has access to all features by default, including Safety Data Sheets.
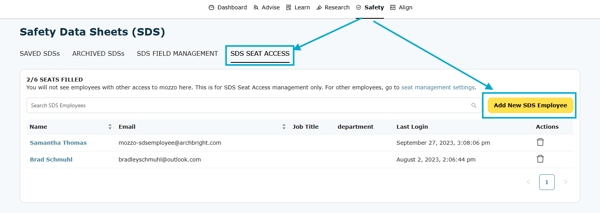
To give access to additional read-only SDS users, go to the SDS Seat Access tab. From here, Add New SDS Employee to grant access to additional users.
Users added from this tab will have read-only access to only the SDS feature. They will not be able to add, edit, or delete information. These users will also not have access to any other part of mozzo.
(To grant edit access to users, you'll need to go to Seat Management under Settings. Settings is found under My Account in the top right corner of mozzo. From here, click Manage by the user seat to grant access.)
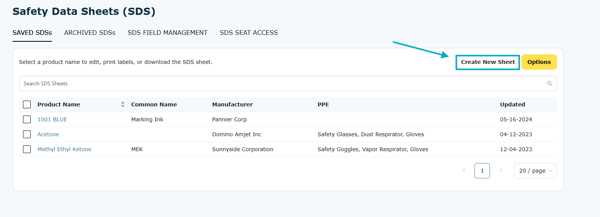
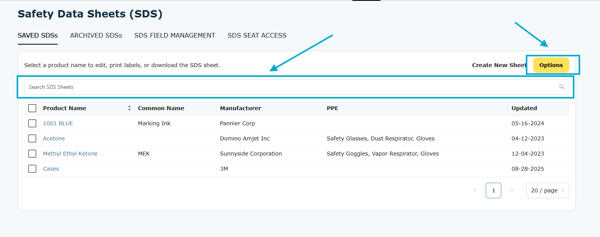
2. To add a new Safety Data Sheet to your library, click on Create New Sheet.
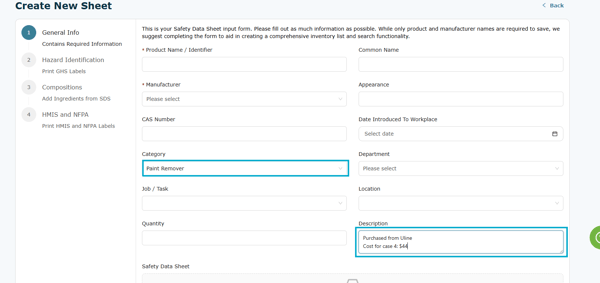
3. Fill out the Safety Data Sheet input form starting with General Info. If you are adding an SDS for a new department, you will need to select Add New Department and enter the department name. (After a department has been added, it will appear in drop-down menus in the future.)
While only some information is required, adding more information will make your library more comprehensive and easier to search in the future. Note: Some fields in the input form allow you to type in information, others require adding new information to the system.

4. You can use custom fields to help your organization track the information it needs.
Utilize these fields any way your wish, such as identifying chemicals used in a process or tracking the cost of chemicals and where they were purchased, even adding URLs directly to the chemical's online SDS.
5. You can upload a manufacturer-provided SDS sheet.
To add a manufacturer-provided SDS sheet to an SDS in your electronic library, click on Choose a File and select the corresponding SDS sheet. SDS sheets can also be dragged and dropped into this field.
Keep in mind that only PDF files are supported in the system.

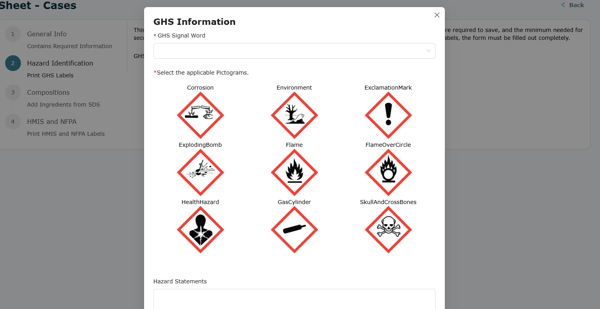
6. GHS Labels: Create, Edit, Print
When in an SDS, you can add or edit chemical Composition information.
This information is pertinent when understanding chemical hazards, where chemicals can be stored, and what chemicals can be stored together.
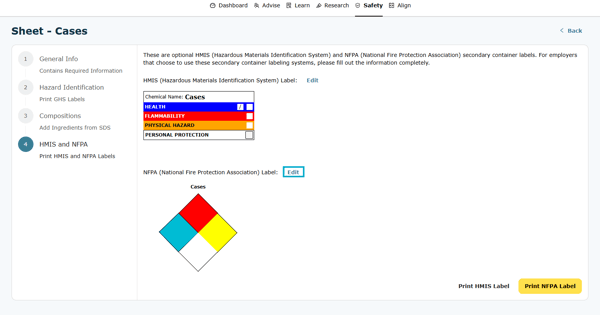
7. HMIS and NFPA Labels: Create, Edit, Print
HMIS or NFPA secondary chemical container labels are optional for workplaces. If your workplace uses these labels, be sure to include them in your employee Hazard Communication training, explaining the differences between them and GHS labels.
To create or edit an HMIS or NFPA label, choose the SDS from the library and select HMIS and NFPA. Choose the label you wish to use and click Edit. Fill out as much information from the SDS sheet as possible. The information can be found in Section 16: Other Information on the corresponding SDS sheet.
After the information has been entered or edited, select save, and then labels are able to be printed from this page.
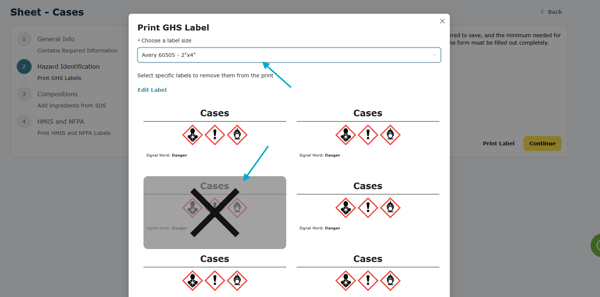
8. Printing Labels
To print a label, select the label size from the drop-down menu. The most popular label sizes have been included.
To remove a label, hover over it and click the X.
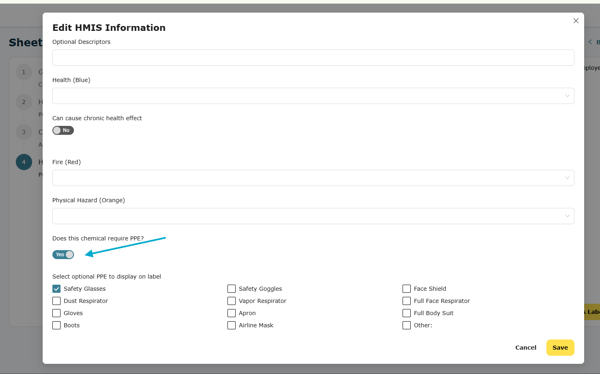
9. Personal Protective Equipment (PPE)
If you wish for PPE to be displayed in your SDS Library, select the SDS you want to add PPE to. Next, go to HMIS and NFPA, then Edit HMIS Information.
At the bottom of this label, you will have the option to add the required PPE for this chemical. To have this information displayed in the library, this section must be filled out.
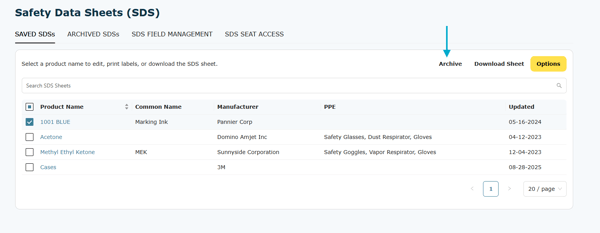
10. Archived SDSs: Maintain
Employers must keep copies of all SDSs for 30 years after the last date the corresponding chemical was used.
When a chemical is no longer used in the workplace start this archive process by selecting the SDS in the library and clicking Archive.
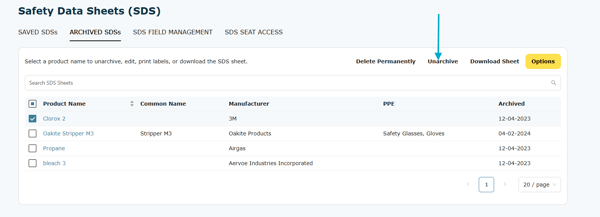
11. Archived SDSs: Unarchive
To see all archived SDSs, click on the Archived SDSs tab. From here, you will be able to see all archived SDSs and the date they were archived to help meet 30-year storage requirements.
You can view, edit, unarchive, or download SDSs in this location.
SDSs must be unarchived anytime the chemical goes back into use. To unarchive, select the SDS and then click Unarchive.
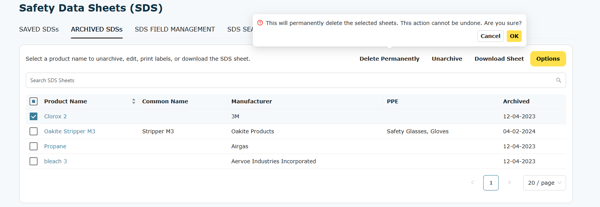
12. Archived SDSs: Permanently Delete
If you find that an SDS needs to be deleted for any reason (has met its storage requirement or perhaps was accidentally created), it must be deleted from the Archived SDS tab.
To permanently delete, select the SDS and click on Delete Permanently. You must then confirm as this action cannot be undone.
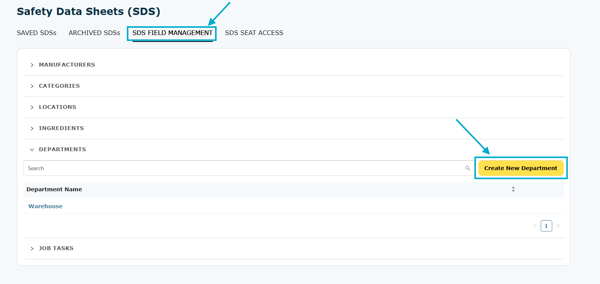
13. SDS Field Management
While it is possible to add all information as each SDS is created or edited, some employers may find it beneficial to manage the fields on the forms, allowing all information on SDSs to be selected from a drop-down menu.
To manage this information, select the SDS Field Management tab and choose the category you wish to edit.
Once you are in a category, you will see all current information listed for that category. Using the search toolbar, you can search for information in that category, select the information you wish to edit, or add new information.
14. SDS Search
You can search your SDS library in two ways:
-
Type in the chemical information in the search bar on the SDS home page. The advanced search functionality will search all information entered for each SDS, such as name, department, and PPE required.
-
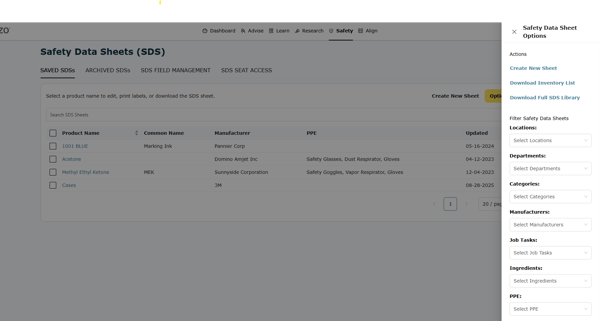
Click on Options to find advanced search filters to see all chemicals based on the filter(s) used. Keep in mind, if used, filters must be cleared to see the entire library again.
15. Download: Inventory and Library
To download an inventory list of all SDSs at your workplace or all information in your library, click on Options from the SDS home screen and select either Download Inventory List or Download Full SDS Library.
Information will be downloaded into an editable Excel document.